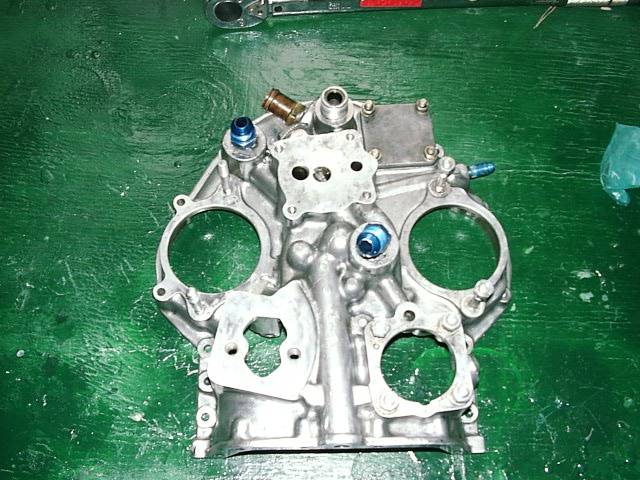
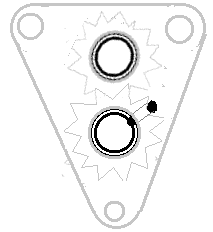
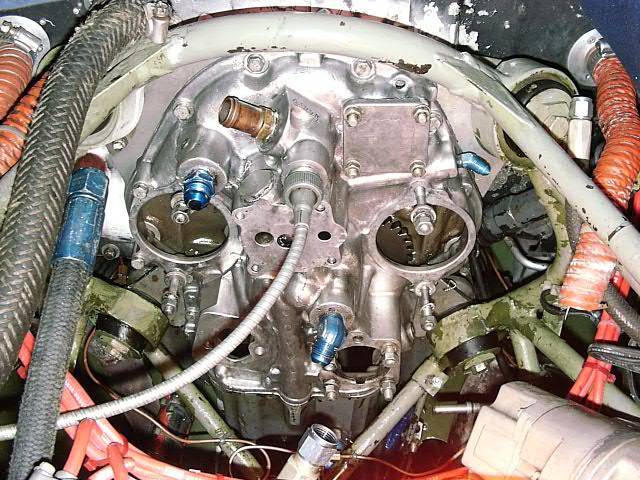
Accessory Case - 11/21/01
There is an AD that states there must be two steel gears in the oil
pump. Unfortunately, you have to remove the Accessory Case to get to
them. The previous owner said he complied and installed a new Superior
pump, but the mechanics wanted serial numbers. So, it gave the the
"opportunity" to check and clean up the accessory case.
| Getting Started |
It's Off! |
 |
 |
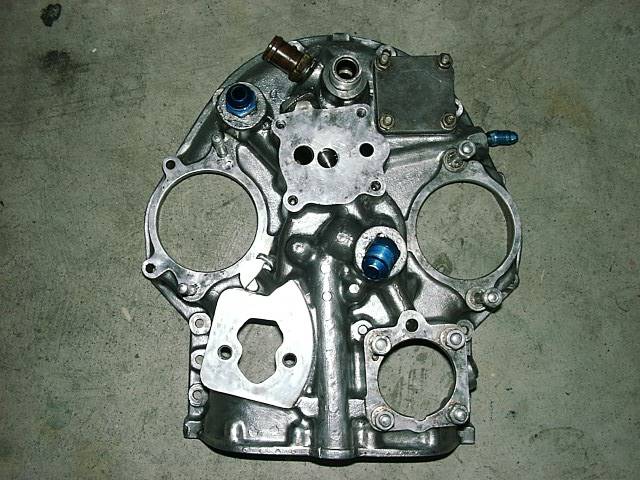
It had a
lot of chipped paint but I decided to leave it bare so I could see any oil leaks
and it would retain its looks a little better.
 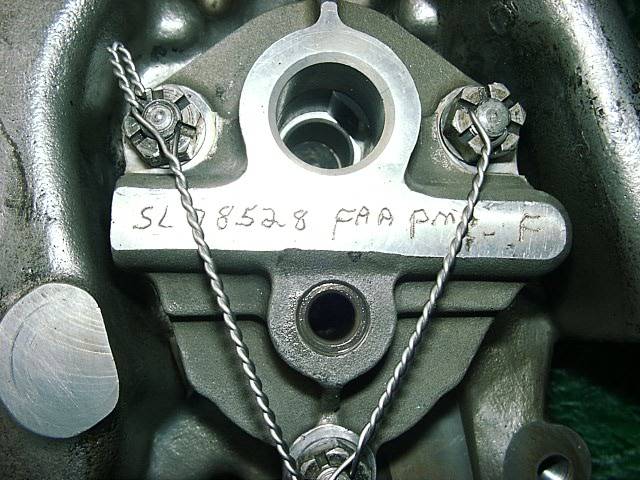
So here are the damned numbers!! SL 78528 FAA PMA-F
 Drilling Oil Journal Drilling Oil Journal
I wish that I had taken a picture of this so its easier to see. There
is a recommendation from Lycoming to drill a hole in the accessory case where
the shaft of one of the oil pump gears fits. The hole is drilled from the
side of the hole to the bottom of it so it lets oil down to the bottom of the
shaft to lubricate it better. I took the accessory case to Lycon in New
Hudson, MI and had it drilled.
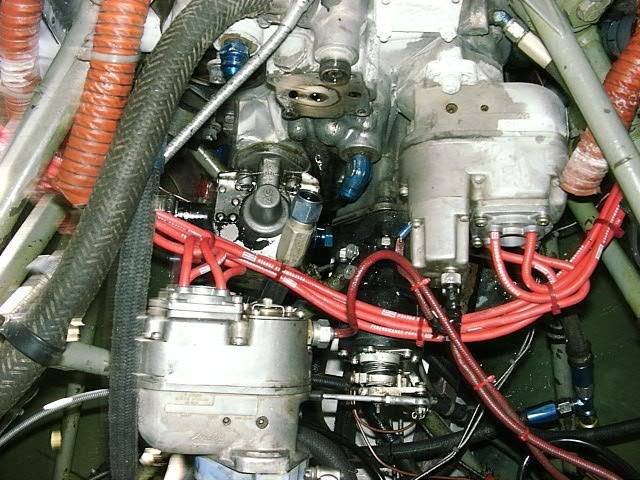
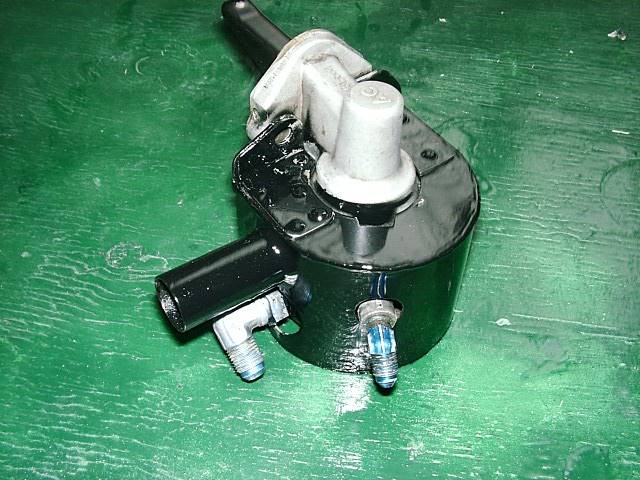
Fuel Pump
The Fuel Pump got a bit of cleaning and a little high-temperature engine paint for the housing.
For the record its an AC 93E00A , 41272 FAA PMA. When I first
bought the plane I had a small oil leak when inverted. Turned out to be a
dog-eared gasket on the fuel pump so I was particularly careful reinstalling all
the gaskets.
Tachometer Drive Shaft
The tachometer drive shaft was worn, so I replaced it while things were
apart. After ordering the WRONG one, I discovered I had a 4 bolt camshaft
that required a special part. Didn't want to find a small oil leak caused
by a part that would require me to take the Accessory Case off again! What
I didn't know is that a tiny little 4" shaft (PN 68757) and pin (PN 1199)
76155 would cost
$258.00!!! Oh well. I also replaced the tachometer drive shaft seal
and camshaft bolt retaining clips.
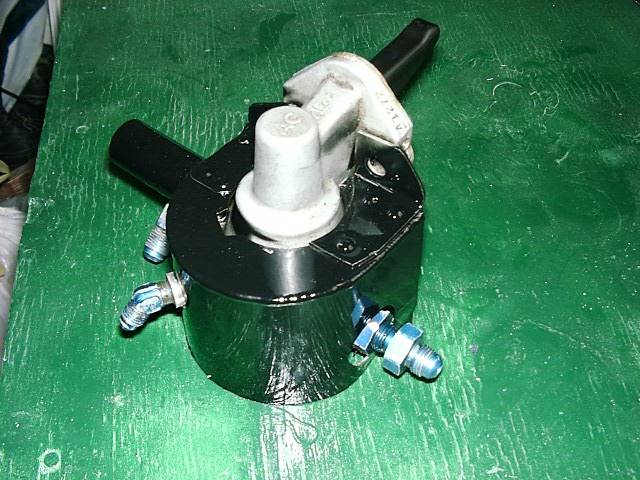
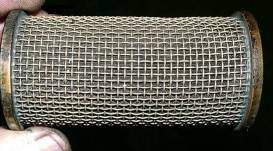
High Pressure Oil Strainer
Constant Speed Prop Governor
Woodward Type 210190 F21080 Model 210305
530426 FAA PMA 514524 S26
Bendix Magnetos
The Magnetos were in good shape so I just captured some numbers while I had
them off. They are Bendix S4LN-21, PN 10-51360-45
| Left |
Right |
| 88631 50483 |
A57320 |
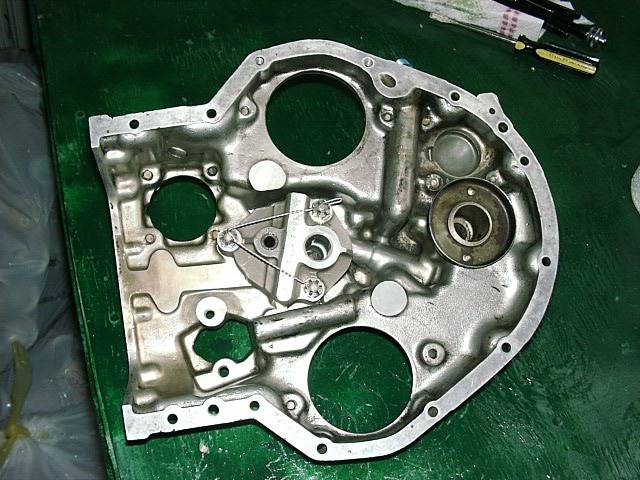
Other New Stuff
Of course while the Accessory Case was off, I replaced all the gaskets,
seals, retaining clips, and the odd sort of item wherever I could.
Reassembly
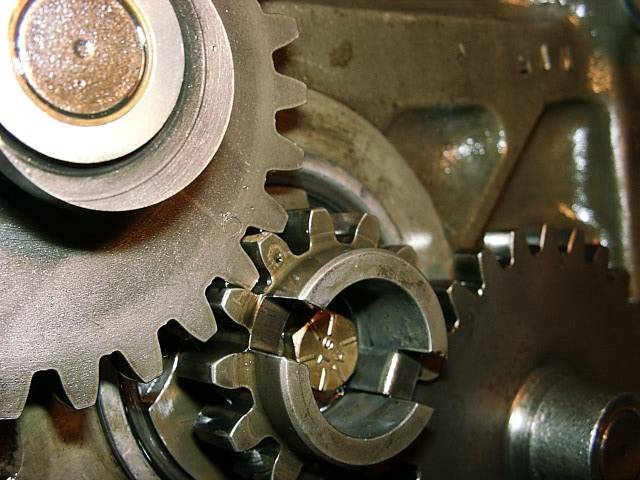
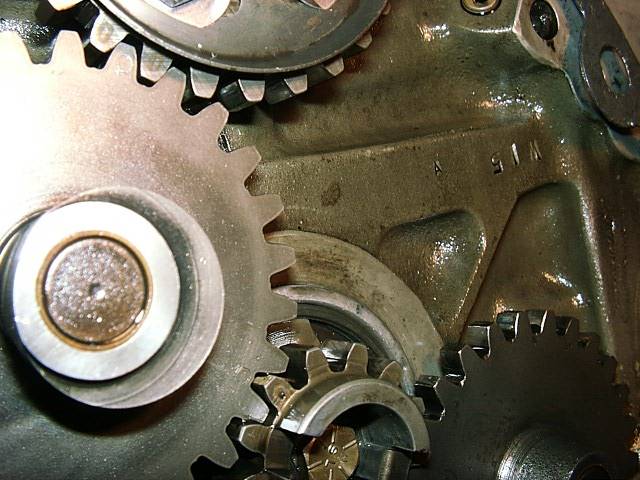
I was careful not to remove the timing gears, but when I pulled the
tachometer shaft out of the camshaft I knocked all the gears off... So much for
that plan! Anyway, as you can see the timing marks are easy to identify
and line up.
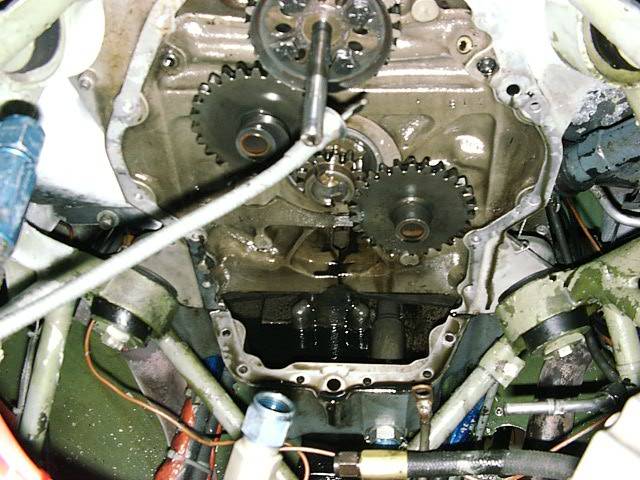
| Accessory Case Back On |
Everybody Back Together |
 |
 |
Engine mount is wide enough to take the Accessory Case in and out
without any problem. Sump gasket had to be cut so it was just the shape of
the bottom of the Accessory Case and not the full sump. Thin layer of
gasket seal on the Accessory Case, fuel pump, oil screen, and prop governor
gaskets. Bolts torqued to 15 foot pounds.
Mag timing was interesting, I had never done that before. Pretty
straight forward steps:
- Make sure #1 cylinder is on compression stroke
- Set prop on 25 degree mark by taking a straight edge down centerline of engine
- Open inspection covers on mags and find the "red" tooth
- Center red tooth even with timing mark on case
- Insert (carefully) mag into Accessory Case
- Disconnect cables and insert timing light leads (right=red, left=green,
ground=black)
- Barely rotate one mag until exact moment light goes on or off
- Rotate other mag the same way
- Move prop checking to make sure right and left light/disappear at the same time
(back prop up enough to take slack out of gears, then forward to check)
- Adjust mags as necessary to produce desired result
Bonus!! No Leaks!
45GG started right up and after holding my breath for a few seconds the oil
pressure popped up to a very nice level. I let it run for a while and get
warm before I shut it off and checked to see if there were any leaks.
There weren't any so I buttoned it up and did a couple of high-speed taxis down
the runway. Still no leaks, so we went for a ride. Man, did it feel
good to get back in the air again. It only took me an hour and change to
take everything apart... about four to put everything back. But the
problem was waiting on the tachometer shaft. I ordered it the day before
Thanksgiving and called to check the following Tuesday. They forgot to
order it!! So it ended being out of action a little over a week.
11/29/01
|